Printers
- PolyJet Legacy Printers
- Alaris30 V1
- Connex260
- Connex350/500
- Eden250
- Eden260
- Eden260V/VS
- Eden330
- Eden350
- Eden350V/500V
- J700 & J720 Dental
- J750/J735
- J750 Digital Anatomy
- Objet24/30 V2 Family
- Objet24/30 V3 Family
- Objet30 V5 Pro & Prime
- Objet260 Connex 1-2-3
- Objet260 Dental & Dental Selection
- Objet350/500 Connex 1-2-3
- Objet1000 Plus
Materials
- PolyJet Materials
- Agilus30 family
- Biocompatible
- Biocompatible Clear MED610
- Dental Materials
- Dental TrueDent Materials
- Dental TrueDent-D Materials
- Digital ABS Plus
- DraftGrey
- Elastico Clear/Black
- High Temperature
- PolyJet Support
- Rigur & Durus
- Tango
- ToughONE™
- MED610-DSG
- Transparent
- Vero ContactClear
- Vero Family
- Veroflex
- VeroUltra Opaque
- Vivid Colors
- Stereolithography Materials
- Somos® 9120™
- Somos® BioClear™
- Somos® DMX SL™ 100
- Somos® Element™
- Somos® EvoLVe™ 128
- Somos® GP Plus™ 14122
- Somos® Momentum™
- Somos® NeXt™
- Somos® PerFORM™
- Somos® PerFORM Reflect™
- Somos® ProtoGen™ 18420
- Somos® ProtoTherm™ 12120
- Somos® Taurus™
- Somos® WaterClear® Ultra 10122
- Somos® WaterShed® AF
- Somos® WaterShed® Black
- Somos® WaterShed® XC 11122
- Somos® WaterShed® XC+
Material Dripping onto the Tray
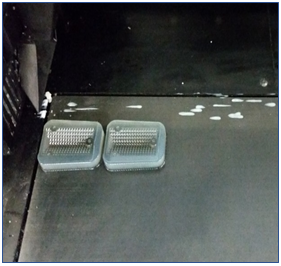
Material Drippings on the Build Tray
Sometimes, material drips on the build tray during a print job.

Possible Causes and Solutions
Roller Waste Collector Full or not Draining
If the roller waste collector is full or not draining properly it overflows and material may leak and drip onto the build tray.
Solutions:
- Clean the roller waste collector.
- Make sure the suction tube is in its proper place and working.
- Verify that the roller scraper is not damaged.
If you are still experiencing issues, please contact your Customer Support representative.
Preventive measures:
- Clean and maintain the roller waste collector once a week.
- Run the Cleaning wizard before and after every print job. Make sure to clean properly between prints and maintain the printer properly. See the User Guide for instructions
- Replace the roller scraper if necessary. If you are using one of our desktop printers, replace the roller waste collector assembly. See the User Guide for instructions. Also, periodically test the effectiveness of the roller scraper when you clean the roller waste collector. Replace the roller scraper blade after 1,000 hours of printing or if it does not effectively keep the roller clean, whichever comes first.
For more detailed instructions, see the Routine Maintenance Tasks in the User Guide.
